Monday, 20 April 2015

Got it covered!

I am soooooo excited.

The finished chair
I've managed to re-cover an Ikea Poang chair for the summerhouse..

Admittedly, it wasn't exactly complex, but I've never done anything like this before . So, for me, it mas a bit of a major achievement.

Even the flapover bit at the top worked beautifully.

Izzy Helping
I broadly followed the instructions on this lady's blog: http://stickelberry.com/?p=683
Before

I can see the flaws, the "could have done it better" bits. But a blind man on a galloping horse wouldn't notice.

There are a couple of things I would do differently if I did it again. Plus I wouldn't take so long faffing around measuring and re-measuring, afraid to use the scissors.

I'd also really like to have sewn lines down it, like the original has. But I didn't/don't have confidence in my ability to sew that straight.

 I had enough fabric left to cover the stool,  and I ordered more fabric so I can attempt to cover DH's chair. Also a Poang, but an ancient version - and much harder to cover.


Sunday, 19 April 2015

Scrubadub

Jet washed, scrubbed, disinfected the Garden Girls Cube yesterday.

Note to self:  jet wash the poo from the mezzanine before doing the inside.


It looks lovely, smells gorgeous (I had a small amount of louse pwder left in a tub; I love that smell, so I put some in the enstbox on top of the fresh Aubiose.


Quick grape.

Our allotment girls aren't showing any signs of worms, but it's supposed to be a good idea to worm them a few times a year anyway.

We use Flubenvet.  Sometimes we buy the marriages pellets which have the Flubenvet already mixed in.  This time, however,  everyone had not long transitioned to Breeders Pellets, and would shortly be transitioning back to Layers,  and I didn't want to introduce yet another type of pellet.

I went back to the grape method.

I calculated that each chook needs about 1.2g of this particular strength of Flubenvet over the whole of the 7 days.  (It's only an approximate calculation, because the chooks are all different sizes).  With 17 on the allotment to be done, I found it easier to round it up to 1.4g and divide by 7 to give me the doseage per hen per day.   I then multiply this bythe number of chooks, 17, meaning I weigh out 3.4g of powder into a teeny tub each day.   I have a set of those highly accurate scales that jewellers (and druggies?) use.

At the allotment, I quarter a load of grapes lengthways, put some in the tub, put the lid on, shake it.

I then have my pre printed spreadsheet with the chooks names on, and I proceed to ensure that each chook gets a piece.  It's not too bad if I divide them up - some are shut outside on the grass,   some inside.  Sometimes we corral a few and do them.   I refill and reshake as necessary.  Sometimes a chook will get two pieces, f they steal from someone else.   When I'm done, I chop up a few more un-powdered grapes and give them out too.

It works well. The Girls adore grapes.

By day 3 I find that most of those Girls who normally refuse to eat out of my hand are happy to do so.  

Henry sometimes hinders.  He'll take his bit of grape and, instead of eating it, he lets it dangle from his beak until one of his haem steals it.  Sometimes he holds it, waits until he has acrowd of adoring girls (adoring the grape, sadly for him) before droping it and stepping back to watch the rush.

I always make sure I give him some unpowdered grapes to use as well. He likes to be his flocks Provider and, because he's such a good natured boy, I'm happy to help.


Sinking feeling


The great Sink Debate caused work on the bathroom to halt.

Pedestal hugging vanity units had been explored.     We looked around a bg chain bathroom store, but couldn't see naything - everything was aimed at people who were buying everything new.Very cheap ones were available online (although I never found them in a real shop).   Very cheap-looking-but -not-cheap ones were available.   

The trip round the bathroom shop looking at vanity units made me realise that I really liked some of the wall hung ones, with drawers instead of doors,  but these weren't suitable because our pipes come up from the floor. 

I was surprised that some of the new units were a lot of money and still felt cheap.

It was going to cost a reasonable chunk of money, and still look like we'd done a bodge job,  so I eventually broached the subject of maybe replacing the sink.  Keeping the expensive and lovely taps,  but not the sink.
 I did some research online, until my head started to swim. 

I looked for vanity units with sinks which would accommodate 3 tap holes.  There are fewer than I expected, and those that I found easily were too ornate for my taste. Ornate and dirt trap types.   The current fashion is for monoblocs.  I did find a company that would drill additional holes in their sinks, so I had a look at those, but I couldn't see that our tap would really work (the nose - or whatever you call the bit that the water comes out -  wasn't long enough).

I did find one that was sort of OK. It was a bit ornate, the cabinet was wooden. It was a mortifying £1200.  That was a lot of money to pay for something that was only "OK".  I realised that, even though my existing tap set was horrendously expensive,  I could probably buy a new sink,unit and tap for a lot less than that the cost of buying a new sink and vanity unit for my existing taps.  

DH and I went to another bathroom showroom, this time looking at vanity units and sinks, and the subject of the taps was raised.   So, this time, we were looking at a complete thing.   We saw a few that were OK, I made a note of the names, but this was just a "fact finding" foray.

Bck home, I looked online. It was no good, I had to see the things in the flesh.

A couple of days later, I decided to venture to another retailer, and picked one in a nearby town. I traipsed round their (what turned out to be) enormous showroom, and found a few possibilities.

I came up with a longlist. Then I realised that some of the vanity spaces weren't very tall,  the bottles of cleaner wouldn't be able to stand up in there.   So I traipsed round again, taking photos and notes. I even found a tap style I quite liked.

It was promising.

The lady was lovely.

At home I showed DH, and said we should go back to look to see what he thought. So that's what we did yesterday morning.     We got it down to the choice of 2.  They were completely different to each other.  One was a very straight sided basin, on a white gloss vanity unit (something I never thought I'd have, but it looked good and the drawers  felt good when I opened it);  the other was the same shape, but a sloping basin , on a wooden cupboard.   Thewhite gloss might actually work better, as we were having wood on the floor, so wooden drawers might be a bit too much.

Sadly, it turned out the drawer mounted version wasn't any use. The cupboard version of that range might have been, but they didn't have one on show.   I tried to explain to the plumber owner that I needed to feel how the doors opened and closed....that often some of the doors look OK and shut OK but feel like crap when you open them.

He looked at me and nodded, and I could see that he was really thinking "what the heck are you on about?".

For the other range, I wasn't sure about the wood finish.  Plus it was a cupboard and I wanted drawers.  Theat manufacturer did do a drawer versionm but it was very deep. It would look like we'd tried to put a kitchen unit in our bathroom (which, in fact, I had already considered and discounted).   I didn't think the cupboard version wuld liook right in white gloss. 

Alongside this, we discussed the tap I liked.  DH explained to me why it might not work too well.  I explained why I liked it.  It was a pleasant enough looking tap and it swivelled.   This meant that you can move it out of the way before spitting out toothpaste. It meant that it would be easier to clean the sink.  It meant there was more elbow room in the sink (not that I use the sink for elbows).  It was quite a high, long, tap, but not so high and long that it looked like an out-of-place kitchen tap.

DH said that the reach of the tap might be a problem on the second, slopey basin.   He showed me what he meant. On the first basin, it was level, so it didn't really matter where the tap water hit.  On the second basin, if it hit the slope we might end up with a mighty backsplash. 

I found myself thinking, "Well, that's that then. We'll have to buy the first basin".   I was a but surprised, I hadn't realised that I was so attached to the tap.  I hadn't even really looked at many - but I was finding that the tap was going to help me choose the basin!

At this point, DH  - understandably - had had enough. I suggested that we went away and thought about it, I could visit a couple of places on my own to look at taps and to see if I could find the cupboard version of the first sink for us to look at.    He was adamant that either of the two were fine with him, and could see no point in delaying.

We measured the tap carefully.  We measured the sinks and compared them.  Really, the obvious choice was the first sink, but I wasn't ready to order without seeing the cupboard first.

So.

Of course.  We bought the least suitable sink - the slopey one,  on a vanity cupboard,  and we had the havana oak finish.  And the tap. Which is not at all the shape and style that I had thought I wanted. Without looking at what other tap manufacturers have to offer.

And all for a huge amount less than the "OK" option.

What if I was just suffering from shopping fatigue?  That's when an individual ends up buying stuff which they loater look at and wonder "what the heck...?

I hope I still like it when it arrives


Wednesday, 15 April 2015

Of course.

Busy morning what with one thing and another.  Weather too hot.

Got home, pootled about. DH opened the summerhouse up to do something in there. By the time he turned round, both the new chairs were occupied. By the cats. Of course.

A bit later I decided to sit in the summerhouse for a bit.  Only one cat remained, looking very comfortable in my chair.  I moved her to her DH's chair and sat down.  Wash came in and looked disgusted to find someone on his chair.

In disgust, he got onto the stool.

Much later, the foam for the cushions arrived.  DH fitted it (it fitted perfectly); he'd also vacuumed the cover several times, and it looks OK.   So, nearly a bargain then.


Tuesday, 14 April 2015

Little Helpers


We have an area in our garden which has a lot of fruit bushes on.  Once upon a time, a long time ago, we (by "we" I mean, of course, DH) erected a fruit cage.   We added more fruit, took some out.  We neglected it.

Last year we talked about what to do.  We knew we were going to have to do something when we decided to build a "Summerhouse" (big shed). We didn't make any decisions because, apart from anything else, the Girls love to rook around in there. 

We talked some more this week, and discussed some options. 

 DH decided he would at least have ago at clearing some of the nettles in an unused part of it.

The Girls got very excited and rushed round to help.

He couldn't move without havig to watch wher he put his feet.


Bathroom break

I think I mentioned our bathroom in a recent post.

The Karndean arrived (thank you to the superfast service provided by Rebecca, of MPM Flooring   I was a bit embarrassed to ask her about it actually,  as they have fitted all the floors and carpets in our house, apart from the bamboo floor in the bathroom that we are now removing. As this was going to be a "supply only" request, I wasn't sure how they'd feel about it.  I needn't have worried, she was fab as always).

The new floor will be lower than the old floor, so there's a lot of messing about to be done. 

DH removed the skirting and architrave, and ordered new ones.   He started to cut out the old bamboo.  He cut out a couple of pieces that were large enough to form new side and end panels for the bath, just in case.  We evaluated the state of the hardboard underneath. When the first chunk of bamboo came up, the hardboard underneath looked in good shape.  However, it's a bit too thin really, so we decided we'd replace it all.   Then there was talk of what to do about the dodgy floorboards, should we do something about those while we're at it?...

Alongside this, we've discussed what to do about the sink pedestal?, which will be a smidge too tall.  The sink itself is fixed to the wall, and we don't really want to take it off to move it up a few mil.  Perhaps we could grind a bit off the pedestal?  Or take the pedestal out and put some sort of vanity unit underneath?  The pipes go from the sink straight down to the floor, so we have to do something.   We've visited a couple of bathroom shops, but these are all geared up for selling new suites, not for adapting existing.     The places that cater for adaptations don't tend to have showrooms,  and Internet pics can be so misleading.

We haven't made a decision yet.   Happily, we haven't fallen out about it yet, either. 

Is that a first?

I didn't take any pics befoe work started, as I was sure I'd have some already from when we did the inital renovations some 17 or so years ago.

I was wrong

Monday, 13 April 2015

Bargains and Unbargains

It's been warm enough to sit outside for the last couple of days so, whilst sitting outside it, we started to discuss what we should be putting inside the summerhouse.  Up to now I've been consistent in saying that we should WAIT and see how we use it before we start filling it up.

A few days ago I thought that it would be good to have a couple of very comfortable chairs in there, rather than just bringing in the garden table chairs.   Not lots of chairs, just 2, for us.  We used to have Poang chairs from Ikea, and I thought that a couple of those would be ideal.   

They aren't particularly expensive - not if you go for the cheapest fabric option (rather than the leather we had on our previous ones).  I looked on Ebay and other selling pages, and could see the price varied quite a lot.  I reasoned to myself that if I bought a couple of second hand ones, I could buy fabric and make new - unique - covers for them. The money I saved on the purchase would more than cover the fabric.

Second hand Ikea Poang chairs are quite popular in my area, and they seemed to be going for reasonably large sums of money. Large enough that I would have just gone and bought new ones.  Eventually, one came up that had only been in a spare bedroom since purchase and had hardly any wear.  The starting price was quite high, but it included a footstool, and the pics looked OK.  I waited to the last minute to bid, and got it for the starting prices. Result!

A second chair was on sale about 15 mins away from that one, and that had a low starting price.  Once again I waited til the last minute, and this time I got an absolute bargain.   I don't understand why so few people bid, or why those that did bid put in such low bids.  Another result!  

We arranged to collect them both today.  The first one was OK. The lady was lovely.   I could see it was a little more worn than I expected.  We loaded it into the car and went to the second one.  

I was a bit embarrassed at the low winning bid, and the second lady had been so accommodating that I had already decided to give her 4 times more than the winning bid, as it would still be a bargain.   The chair was pristine,  it could have been brand new. 

We loaded it into the car, and realised that the first chair was slightly different. Definitely a Poang, but it must be a much older version.  Never mind, no one would know, once both chairs had been recovered.

At home, I decided not to bother washing the second cover, it smelled freshly laundered.  We DEFINITELY needed to wash the first one though, nothing nasty, just age.   We took the cover off, and realised that the cushions would need replacing.   A few bits of foam, it'll be fine.

Then we discovered that the covers on the first one are not washable. Not dry cleanable. Nothing-able, apart from upholstery shampoo.    These chair and the way the covers fit are that bit different to the new ones, it requires an extra layer to slide over the back of the chair.   I'm not sure how easy that will be with my (lack of) sewing skills.   

I said to DH that I would buy another chair, and we could just sell that one (without the cover and the cushions if necessary). It didn't matter, it hadn't been that expensive (we had the stool too, remember), so it wasn't the end of the world.

DH wanted to keep it (goodness knows why! Contrariness perhaps?).  We agreed that he would order some foam (suitable for upholstery) cut to size   £40.  £40!    He's gone off to find out about "upholstery shampoo" now.

Meantime, I''ve got a couple of possible fabrics in mind for the new cover (of my chair at least). One of them is very bright, I'd ordered it in anticipation of the re-covering, and I can't see DH approving.    A second might be OK.  A third is a different colour variation on a fabric I have already so I'd need to go and buy it.

I'll wait til the bright fabric arrives and then make a decision.

Meanwhile, I've printed off blog entries from 4 different people with their instructions for re-covering Poangs.

I need to psyche myself up to try and read them properly.

Wish me luck, I may be gone some time.

Sunday, 12 April 2015

Cry Baby Bunting

Apologies if I have already mentioned this.

Yesterday was the first birthday of my Great Niece, and her parents had a party for her.  As her birthday present, I made her some bunting with her name on.    I didn't want to use all pastel colours, but somehow I ended using a lot of pink, and the end result was not particularly harmonious. 

I realised that, because I had used capital letters,  the name was reversible apart form the E.  I had a flash of inspiration when I realised that I could make the E reversible by putting bunting holes in the bottom as well so it could be turned over and upside down.

I had also had the bright idea of making the first letter from a bigger alphabet, like a capitalised capital , but I hadn't factored in that the name was strung from the top, so in the end it looked a bit...odd.   By the time everything, including the hearts and bows, were done,  I had had enough of said bunting, and I couldn't face re-doing the first letter.

I'm getting a sense of deja vu (or whatever the typing equivalent is), I'm sure I wrote about the false finishes.
Anyhoo.

The end result was OK.

I also made her a card with an appliqued "1" in beautiful baby-appropriate fabric.
I was going to post a picture of both, but have discovered that I didn't take one of either.

Botheration.


Wednesday, 8 April 2015

Cream crackered

Just got back from 4 hours with the allotment chooks. It was a gorgeous morning, so we decided today would be The Day.  We loaded the car - pressure washer,  generator, strimmer, knapsack sprayer, Poultry Shield,Stalosan, Diatom, Face mask, shower cap, gloves, cloths, bottled water... and set off.

Big Shed first, as this takes the longest to dry;  then Mrs' wooden coop (We still call it that, even though Mrs has been dead for some time),  Empty, clean, Poultry Shield, leave to dry.   Then pressure wash the roosting bars and poo trays,  then Poultry shield the nest boxes from the Shed.

Next, the new coop,  finally the Cube.  

Henry took his wives for a stroll outside the allotment, but the noise of the generator, and the growing pile of poo trays, nest boxes and roosting bars, bothered him. The final straw was when I started pressure washing the roosting bars, I think the noise was too much.

 DH was busy strimming,  so Henry kept his Ladies away from that side of the allotment too.

The Cube was dry first and was Stalosaned and Diatomed, and filled with fresh Aubiose.   Next, the new - home made - coop was puffed and filled;  and then Mrs' coop.   The large nestbox in Mrs' coop was immediately occupied by a broody black chook.

Henry was happy when the generator was turned off, and took a section of his harem out for a wander.  The netting was down,  and we saw him wandering round the perimeter.   The promise of corn brought him and most of his wives back,  just one little escapee had to be fetched.

We did all the other little bits and started to put stuff back in the car,  and then I was able to put the shed back together.  Two more broodies occupied nestboxes in the new coop.  I hope the ones we want to collect eggs from don't go broody.

It all looks and smells lovely.

It'll last for a day or two.


Tuesday, 7 April 2015

Nesting

You may remember that, some time ago, Lotti built herself a nest in the pampas grass.   You may also remember that Florence, our enormous Australorp who we thought had gone through the henopause, decided she really liked this outside nest and wanted to use it too.  

Daily slanging matches ensued.

Lotti would shriek loudly every time Florence was in the nest, near the nest when Lotti was in it, or just whenever she felt aggrieved.  Florence would bok mournfully when Lotti was in the nest.

Mostly, we tried to ignore it.  The weather has been better recently, and we've had the kitchen door open in the morning. It's quite hard to ignore the cacophony with the door open.

I decided to help Lotti build a second nest in the Pampas.  I went out with a bill-hook, and did some general trimming, looking for a suitable entrance.  I realised I was a bit limited: the Pampas is on the corner of their netted area,  so a nest on two of the sides would jut serve as a launch platform to get her over the netting and out in to the rest of the garden; the original next was on the third side, so I had to try and find somewhere on the only remaining side,

I was suitably attired for attacking Pampas: years of experience on the wrong end of the sharp fronds has taught me to make sure my arms and top are fully covered, and to wear thick gloves.  I poked around a but and found a tiny hollow that might be enlarge-able.  I removed some stems, and hollowed it out a bit.  I caught Lotti and put her in.  She burbled happily, and then barged through what turned out to be a party wall into her original nest.

I worked some more, taking out another stem from the edge to make it bigger.   I put dry matter in the holes to make a floor. I, reluctantly, moved the 2 eggs from her original nest into the new nest.  I caught Lotti and put her in it.  She looked around, and then tried to escape throughout the party wall again. 

Meanwhile Florence decided it was time to lay and flew into the original nest. Lotti went loopy.

I took out a stem from the side wall (not the party wall)  to make a bigger cavity.  I padded it out some more.  I put Lotti on the ledge below.  She jumped into the new cavity, looked around, and thentried to get into the next door nest.  I blocked Florence from leaving. The row continued until I gave in. Florence jumped out, Lotti moved in.

I worked some more, removing a stem from the back, which made the nest a bit bigger.  I grabbed a handful of nest material from the old nest and padded it out with that.  I rearranged Lotti's eggs.    Florence jumped into the original nest.  I caught Lotii, put her on the ledge below the new nest, and watched her jump in. She turned around.   She snuggled down on her eggs.  She pecked some of the side walls a bit.   

And then she laid today's egg. In the new nest!

Result!

Of course, that doesn't mean she'll use it tomorrow.

But I am hopeful.


Friday, 3 April 2015

De-flamed

The Naproxen is working well today.

House presentable.
Visited Costco to buy some cider,

Finished birthday present for Great Niece.

Actually, it was only when I was attempting to assemble it I realised that I had been premature in whipping the last few pieces off the embroidery machine: the eyelets hadn't sewn in the last 2 pieces.  I  cursed, and adapted a design so I could do a placement stitch (so I knew where to place the item) and then straight to the eyelets.

All done, stabiliser dabbed off, I carried on.  And found that the last piece - actually the middle piece of the banner -  was also eyelet-less.  Not quitesure how I missed that, but I had to fix that too.  While it was sewing, I realise that, by luck of her name,  every item on the banner was reversible. Except the E.   That meant that her mum and dad would have endless variations they could choose for the look of the banner.  Except for the E.

I twiddled in in my hands.

I realised that if I put eyelets in the bottom as well, it could be reversed by turning it upside down/  So, back to the software to create a placment template and eyelets. And sewed.   I couldn't find the cotton byds to dab the "WSS" (water soluble stabiliser) off the back of those last two pieces, so I used the tap.

B I G   M I S T A K E.

There is, of course, WSS in the middle of the sandwich of fabrics.  There is now mush in the middle.  I've put the offending two pieces on the radiator, in the hope that they will dry better than they currently look.

Meanwhile the rest of the banner is sitting on the worktop,  half on and half off the ribbon.

When it's dry and done, I'll post a pic.  Probably. Maybe.

Thursday, 2 April 2015

Birthdays

April is a busy birthday month.

I'd made a card for my granddaughter (see previous post), and then I saw some fabric on a Facebook Fabric site and I decided to make her something from them

I used BigDreamsEmbroidery's reversible "Ribbon Romance" banner. I picked the largest size, 6 inches square, which was a bit too big really.

I used washaway stabiliser, which meant a much cleaner edge finish, but I did stuff a smaller piece of tearaway stabiliser in the centre (not to the edge) to add some protection for the sewing of the name.

I wish I hadn't, as it feels artificially stiff now. 

Never mind, it's done.


I wanted to make a card for my friend Sandra.  However, I'd already bought a card for her ages ago.  I looked at the card I'd bought, and I really liked it.  I thought about embroidering inside the card, but I could see that ending in disaster.

In the end I decided to do an embroidery of her name and to stick it into the inside of the card.  I had a brilliant of using FilmoPlast (a sticky-on-on-side stabiliser), but using it upside down.What a great idea!  I could then peel off the paper and use the sticky side to stick the design to the card.

The first time I tried it, all went well. Until the "d" was sewn, and chewed the stabiliser to shreds.

The second time I tried it, I put stabiliser on top of the FilmOPlast. All went well. Until I tried to remove the backing paper and the whole thing fell apart.

The third time I tried it, I put stabiliser underneath the FilmOPlast. All went well until I discovered that I didn't have enough stick to stick the name, and then it started to unravel.

By now I was going off the idea.   I am, however,  stubborn tenacious, and I really like to be able to overcome problems. 

The fourth time I tried it,  I sewed on to stabiliser, cut it out with pinking shears, and glued it.

It's my great-Niece Thea's birthday shortly, so I need to work on something for her next.

Cup of tea and a break first.

Monday, 30 March 2015

Making fun

I've busied myself yesterdaywith lots of creative bits.

I started with my first attempt at a Free Standing Lace (FSL) item.  This is made using a soluble stabiliser (I used Fabri-Solvy), which is washed away when the design is complete.

Turns out the hanging loop isn't in the hen's centre of gravity (I'll need to see if I can correct that, it means editing the source design), so I had to lie her down on some black stuff to photograph her.  
 I have 9 more hens and 10 cockerels in the set, and I expect I'll make them at Christmas. The two sets were from embhome.com

Next, I tried my hand at a couple of mini snowflakes.There were 10 in the set, again from embhome.com.  These came out really well, and I'll be making more for the tree (or maybe for cards) at Christmas. I think I'll try metallic thread for them. 

That was enough FSL for today,  so I turned my attention to some of this month's birthday cards.  I made this for our granddaughter, who is learning to play the harp.  The phone camera doesn't pic up the detail. I had some Barbie-pink netting with some silver glitter spots on, so I put that over the card and embroidered the design on top.  I then cut away the excess.   I think I should have chosen mesh  (or Organza) populated more densely with spots, but it's OK.

Next, another version of a card for my niece.  This is my second attempt... With the first, I didn't want to use spray adhesive on the card (it gums up the needle and gets over the hoop),so I used magic tape.  When I peeled the magic tape off it wrecked the card.

With this second attempt I used spray adhesive to float the card, and I floated a layer of tearaway stabiliser on top of that too so I had two layers of stabiliser. The stitching was too dense to put straight on to card really, but it looks OK. Mostly. Well, if you don't look at the poor placement of the "r".   The original version had stars in several colours, I decided to just use one colour here.
I've left the small needle in the machine (must not forget that!), as I have another card to do.

Idiot!

I had an Ocado delivery coming today.  Late last night, just before the cut-off time, I remembered that I wanted to add a shower puff thing to the order.  I did a quick search for "puff" and soon found them.   They were quite expensive for bits of nylon,  but they did a lovely orange and a lovely lime green, and on offer at 3 for 3 so I added them to my trolley.


The delivery arrived this evening and DH unwrapped one of the puffs - rather nice of Ocado to wrap them - to put in the shower. He brought it downstairs for me to look at.  It was a bit odd. It was  rather flat and wrapped in coloured paper.

He looked at the wrapper.

It was an Orange Tissue Paper Pom Pom.

"This Paper Pom Pom Decoration is the perfect addition to your birthday party, garden party, wedding, or barbeque. Pom Pom Decorations also make great fiesta decorations! Coordinate with other solid colour party supplies and party decorations for a very colourful occasion! "

Sunday, 29 March 2015

Memory tricks

When I re-started playing the organ, after many years of not playing at all, I was surprised at how much I remembered .  I stopped learning to play the organ when I was about 15, I think.  I carried on playing, intermittently, but I didn't actively learn anything new.

When Orla arrived I found her so easy to play, easy to play well.  I found I could play lots of things I'd never played before. I bought new books, I learned to play dozens and dozens of new songs.

I also learned to play some challenging (for me) pieces,  having to work hard and repeatedly at some bits to get them right. I don't waste energy on getting cross with myself.  I've learned not to get stressed about it, I know that  I will get there. Each time I've "mastered" one of these challenging pieces I feel a sense of accomplishment,, both for the achievement itself and for not getting worked up about it.

I've just this weekend finally managed to master a tricky few bars on an otherwise fairly easy piece, and I'm really happy about it.

I will have to keep playing it though because I've realised that my fingers don't retain the information as well as they used to.    When I was younger, I would find it easy to retain a learned song,  now I have to play it every so often, otherwise I forget a bit. They just aren't going in to my long term, automatic, memory.

The other thing I have noticed is that I can't play many of the new songs without the music in front of me.  That's a big difference to when I was younger.

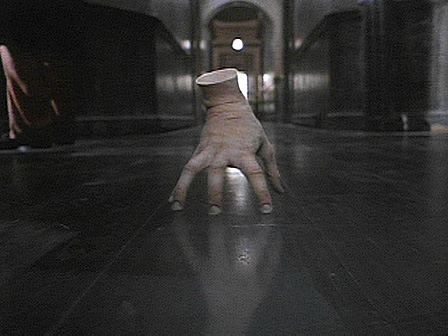
Today I was tinkling the keys and my hand started to play The Arrival of the Queen of Sheba.  I was fascinated as my right hand managed to play the whole of the melody - well, as much as I had learned when I was 15 (It was the last piece of music my teacher got me to play).   Apart from the opening few bars, I couldn't remember the tune in  my head, but my fingers did.  It was a bit like watching Thing in The Addams Family as my hand moved over the keys.

I dug around in a cupboard and found the music.  When I tried to play using my left hand and foot as well, the whole thing fell apart.  And shortly after that, my right hand - which was getting a little tires I think - decided it couldn't remember it all anymore either. 

I don't know how I can get my recently learned pieces into my long term memory storage, maybe it just isn't possible?  

I think I'll select a few pieces and teach (force) myself to play them from memory, rather than by reading the music.Perhaps that will do it.


Saturday, 28 March 2015

Ups and Downs

It's been a very up and down week.

I got up one morning to find a sodden towel by the radiator in the bathroom.  I picked it up and, somehwat gingerly, sniffed it.  To my relief, it didn't smell of anything in particular. I mentioned it to DH who said the radiator had leaked.   We cleaned up, and put kitchen towel underneath, to see if we could spot the leak. Of course it stayed dry.

A couple of days later, I was cleaning the bathroom, and I found water underneath the soil pipe. Nowhere near the radiator. It was defintely a soil pipe leak. Probably.  I called DH to investigate further.  Yup, definitely a leak. 

We discussed the implications of a fix, which included having to cut out a rectangle of flooring around the toilet.   A hole in the floor isn't a disaster. We've been talking about reflooring the bathroom for several years now, but the associated implications (moving the toilet, radiator, and basin) kept resulting in us deciding to "leave it for now"

The toilet had to be fixed so DH who is a whizz at almost every handman job imagineable, set to work.He did a fab job of neatly cutting ot the flooring.  We left the toilet unplumbed for a couple of days while the floor dried out.

By coincidence - genuinely - I had an email from Karndean advertising the third release of their new "loose lay" product.  Because of the hole in the floor, and because Karndean is are solid flooring everywhere else in the house,  I took the time to read about it. It sounded interesting, so DH had a look.  Then we went to look at some.   And then we came home and discussed it.  It's a completely different sort of flooring to what we have elsewhere, but it is much easier to lay. More importantly, individual pieces can easily be removed and replaced.    

We agreed we'd do the bathroom, but not the rest of the upstairs. The bathroom could get away with having differnet flooring, so if we put it down and didn't like it enough to use it elsewhere, then no harm done.
We disagreed about the laying pattern (the joy of the online visualiser), but we'd agreed on 2 possible colours - both from Karndean's first release.   We also agreed that we'd buy enough to do it the way I would prefer, and the nature of the product means we can lay it out and see what we think before commiting to the final pattern.

We left the choice of colour to percolate overnight and, by the morning, we'd each come round to the other person's point of view! How typical of us.

It's ordered now, so we'll see.

Meanwhile, my "back" ache is getting worse.  The anti inflammatories prescribed by the Doc haven't helped that, although they have worked on my knee.  The blood tests on Friday were relatively painless, helped by the fact I've decided to stop being such a baby about it and the fact that the lady who took the blood was really kind and calm. I thanked her because it was probably the least stressful blood-taking I'd ever had.

I've not been interested in machine embroidery for a few days, I was wondering whether I was now officially bored of it.   I had an email from one of the sites I've purchased from, and they were having an Easter sale.  I didn't buy anything, but I did check my Wish Lists on some of the other sites and found sales all over the place.   I bought a few things, and I had a go at a couple of them today.  They came out well and I'm feeling a little more energised about it now.


Monday, 23 March 2015

Still on the case

Some longer zips arriived on Saturday,  so I attempted to make a simple pencil case from a designer I haven't used before.  It was awful. So awful, I must have not followed their sparse instructions (and useless photos)  properly.  I threw it in the bin.

After that debarcle, I was feeling rather fed up, and couldn't be bothered to do anything apart from clearaway the worktop. 

Hmm. Not good.  I know what I'm like, and I could feel there was a risk of me avoiding doing anything for days - so, before I finished clearing up, I made myself cut out fabric ready to make a Digistitches 5x7 zippered case.

The cut fabric and zip sat on the table for the restof Saturday, and all day yesterday.  Each time I walked past it, I smiled at the fabric and my careful pattern matching.

Today I decided to give it a go.

It was relatively quick. After all, I had the fabric already cut,  and I'd already made the 4x4 case so I knew what to expect.

I was really pleased with the end result.

The Digistitches cases are unpadded but are fully lined.  They are quick and easy to make.

I'm going to make a bigger one I think.

They are missing one vital size - a size I already have with my Embroidery Garden case. The EG case required whip stitching, which I just can't do neatly or reliably.   However, maybe I can use the technique used by Digistitches of leaving a larger bit of fabric at the open hem, and then wundaweb it together.

I had a quick look at the EmbroideryGarden instructions, and it might be possible. I'll try it.

I'm not sure which I'll try first - the bigger Digistitches case or the attempted adaptation of the EmbroideryGarden  design,

I bet you can't wait to see, lol.


Friday, 20 March 2015

Quick chop

Made a simple card for my neice's upcoming birthday. It's a while away, I'm just trying to get organised.

Similar process to the card I made for Darling Stepson. This is a smaller card, and I've cut the name vertically (becuase the cards don't support themselves too well horizontally).

This time I used a fabric adhesive spray on the fabric. This worked really well...although I think I must have got some on my Cammy cutting mat.  A bit of a problem as it was permanent adhesive that I used. Botheration.


Warm

It's been warm(ish) so we haven't been lighting the fire and I haven't filled up the log basket.  The sun was streaming through the french window today, and the basket has now been commandeered by a sleepy ginger cat.


A case in point

it's been a busy and "productive" few days.  Well, productive in the sense that I have produced something tangible.  Possibly not productive in the sense of how long they took.

I still can't believe that I can produce anything, it's so out of my comfort-zone,  so.... not me.

Before "First up", I made a really pretty little credit card case,  the design came from Embroidery Garden. I don't have a photo, and I can't find the case.... I think it's possible I threw it away.  It was a lovely case, but it required finishing by hand which I am incapable of doing.  I didn't realise it needed this, otherwise I wouldn't have bought the design pack.

So, on to the things I do have evidence of.

First up was a tissue case. I have several, bought, cases. None with a zip.  Here's the one I made using a design from a company called Five Star Fonts,
Zip Closed

Zip Open
 Of course I didn't manage to capture the detail with my phone's camera. The zip and lining are emperor purple. The top is lightly padded and therefore had to have a quilting stitch over it.


Following on from the success of the Tissue case, I purchased a set of cases from Five Star Fonts.  I only have 7" zips at the moment (the postman will bring me longer ones shortly), so a couple of days ago, I tackled a 5x7 sunglasses case.  This required batting (padding).  I tried with my polyester batting, but as part of the process requires stitching directly onto the batting, this was a fail.

I popped to our local fabric shop to buy some cotton batting. and some interfacing (which, confusingly, looks like stabiliser to me). I couldn't remember why I needed interfacing, I just remember having read it on some PDF instructions,  so I bought 3 different sorts.

Yesterday, I made myself sit down and try again.  It was a bit of a long process, but I think that a second attempt would be much more speedy now I know what I'm doing.   T&he cotton batting was quite thick (too thick, perhaps),  so the finished case was fairly solid.  However, as it is a specs case, I suspect this is part of the design.

This design required me to do pattern matching , so that the fabric to the right of the zip (the yellow cat) matches up with the yellow part-cat to the left of the zip.  This  time I used a bright orange fabric for the liner and a matching bright orange zip. I might try an unlined version of this - or a version lined with, say, clear vinyl - later.

Zip closed and hidden
Zip open

I still wanted something smaller, so yesterday evening I bought a zippered bag set from Digistitches. These are quick to make, don't have any batting (padding), and the final bit can be finished with Wundaweb.  I made the 4x4 purse this morning.

This time I started with the zip - I have a few brown ones - and looked for fabric to work with it. I put the pattern matching "skill" I'd learned from the Five Star Fonts one in to practise.
Pattern Matching above & below zip
Finished - Closed

Finished - open


Once the longer zips arrive I want to try making some of the larger cases. It will be interesting to compare the process from multiple suppliers, where the sizes are similar.    I also have an inexpensive design from NewfoundApplique  to try; this one has no batting or quilting.

I wonder if the grandchildren actually use pencil cases? 

Wednesday, 18 March 2015

Eggsactly

We're enjoying a reasonable supply of eggs at the moment.
 
At home, only the two youngsters, Poopy and Lotti, are laying.  The other 3, who are rising 5, haven't laid for about a year now, although Florence has been crouching for me lately, so I guess she might.

At the allotment, the 3 babies (from last year's hatch)  are all laying regularly. .  As far as I can tell, the 3x rising 6 year olds aren't laying,  a bit of a shame as I wanted to try and have a baby Norman this year (having failed last year because she went broody ).     The two 4 year olds are laying at least intermittently, I know that becuase U;ve disturbed them on the next box from time to time.  The main harem, who are rising 3, are back in lay, and I anticipate a lot of broodiness as soon as the weather warms up.

We don't have a surfeit of eggs, but we do have enough to have 2 eggs each fror breakfast every day,  4 eggs a week to give to our next door neighbour,  and eggs to cook with.  Today I attempted to make Magic Custard Cake,  I'll tell you more about it when I've seen whether or not it works.

It won't last long.  Soon broodiness will kick in. It would be helpful if they didn't all go broody at the same time.


Friday, 13 March 2015

Cheese

Thermie and I made some cheese scones earlier.

I used the standard Thermie recipe (which used a whopping 450g of flour), but used buttermilk instead of milk.

They are (or, more accurately, were) divine.

I might whip up another batch later.

Or perhaps I'd better not.


Cammy Crazy

It was most unexpected.

I bought the Cameo Silhouette ("Cammy" as s/he is now known) to cut fabric shapes for applique and embroidery projects.   After a shaky start, it's now working really well.

Of course Cammy wasn't designed to cut fabric, s/he (can't tell yet whether Cammy is a he or a she) was designed to cut paper and vinyl and stuff;  the fabric cutting  is just a bonus.

I had decided to make Darling Step Son 1's birthday card, and had sought out and bought some aeroplane fabric especially.  I knew what I was going to make, I loaded the designn onto my embroidery machine, laid out the fabric... and then I changed my mind.


I thought about Cammy and what s/he could do.  So, I decided to try  a "simple" cut of his name in the card,  backed with fabric.  Despite the " ", it really was easy.... it just took me 4 or 5 versions of text before I found a combination of font and size that showed the aeroplane pattern off reasonably.

It wasn't easy to stick the fabric to the card at the front - double sided
tape and glue dots didn't stay stuck to the fabric. In the end, I used Pritt to stick the fabric to the inner lining sheet, then used double sided tape around the inside frame and stuck the lining sheet to that.

The images are a bit big, really,  to be used in a name cutout.  I suppose I could have cut a shape....maybe an aeroplane shape... and backed that..... 

No. I'm not doing it again.    I'm not.

But I will bear that in mind for other items.


Tuesday, 10 March 2015

Gobby chickens

Since Lotti - our loopy Exchequer Leghorn - came back in to lay,  she and Poppy have been really noisy.  Sometimes it's non-stop,  and that's when there is nothing of note for her to witter about.  When there is, such as Poppy managing to escape - which she does regularly - then the volume and the shrillness increase dramatically.  She's such a tell-tale.

Sometimes she manages to get all 5 of them at it.

When peace breaks out, a rare occurence,  it's bliss.

Monday, 9 March 2015

Naturally.

I've got an intermittent back ache. 

When it gets quite  uncomfortable, I use a small heated blanket. The gentle warmth soothes and relaxes it, and it really helps take the pain away.

I@ve been careful to put the blanket up on top of the sofa, out of the way of nosey paws.  Until today when I got up to make a cup of tea.


All of a flutter

After the trials and tribulations of the tags for the Twins,  I was hoping that the card for my mother would be a little bit easier.

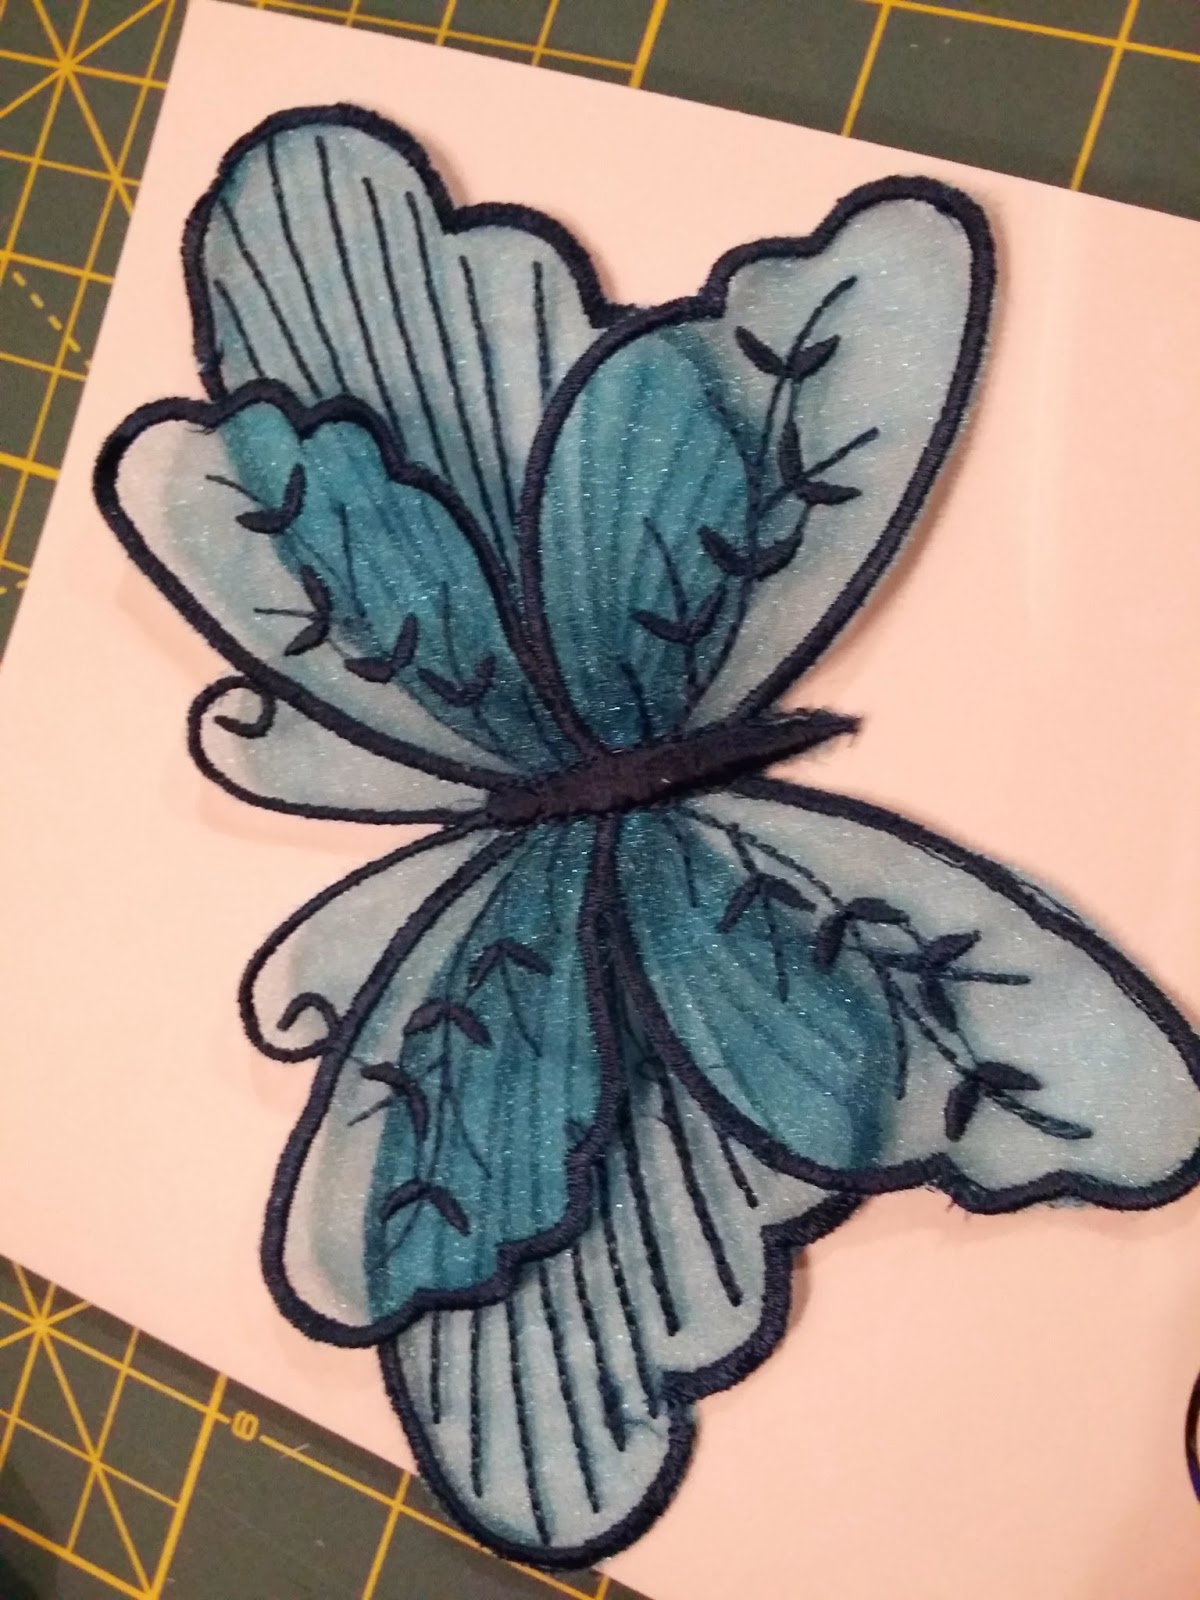
I'd already made the card for my MIL.  For my mother, I had decided to make an organza butterfly. I'd seen one of these on a Facebook page a few weeks ago and had bought the design.  I kept not getting round to going to the fabric shop, so I ended up ordering some organza online - probably a less-expensive-overall option that risking going in to a fabric shop.  

The saga of the Twins stuff meant that I had had enough of embroidery to last me for a week or so.... but I wanted to make the Mothers Day card so it was done and ready to post.    The butterfly back is made first, then the wings,  then these are attached to the body. All done in/on an embroidery hoop.

I made my first butterfly, and was really pleased with the results until I realised that I hadn't quite got the body in the right position relative to the head.   It was a good learning exercise.

By a quirk of machine hoop sizes,  the back needed to be made on one sized hoop,  the wings could fit on another size, and the teeny body and assembly is done on a tiny hoop.  This was great, as it meant I could have everything hooped and ready to go, no messing about re-hooping part way through. 

My second attempt was therefore much faster.  The butterfly was most acceptable.   The design wasn't particularly cheap, it came from Embroidershoppe.com


I used an A4 sheet of 280gsm white card, which I folded in half.  I decided to use my Cameo Silhouette to carve my mother's name out of the card, which worked well (although I think Cammy was assuming I wanted to use the letters that were cut out, rather than using the cut-out, IYSWIM. That's why the O looks the way it does). 

 I stuck some complementary fabric from my stash of fabric squares to the inside cover, which added interest to the cut-out name.   Finally I computer printed an insert, which I glued to the inside front to cover up the back of the fabric.

I'm pleased with the result, and feel strangely refreshed.

Heartless

I am sick to death of making those heart shaped things!

Some of my (many) rejects
It would all have been OK if I hadn't got it into my head to stuff both sides.  I've tried many variations now, and it always almost works, but not quite.  I got close, but the stabiliser couldn't cope and statred to come away as the last little bit was stitching.   I sighed,  cut some more hearts, and worrked out how to reinforce it.  It sewed perfectly well, but was so hard (with layers of stabiliser inside) that I might as well have not bothered with the blooming stuffing.

I had to get the presents in the post this morning, so yesterday morning I decided to sew tags without stuffing.  I couldn't face doing hearts again, so I did bows instead.  Of course I had to go through the scanning etc (sidetracking to see if I could improve that side of things),


I ended up with some beautiful bows.The final versions were lovely (although not quite perfect).#

Of course I failed to photograph them before packing intrictaely fixing them to the presents and posting them off this morning.

Oh well.

Hope they like them!


Followers