Monday, 23 March 2015

Still on the case

Some longer zips arriived on Saturday,  so I attempted to make a simple pencil case from a designer I haven't used before.  It was awful. So awful, I must have not followed their sparse instructions (and useless photos)  properly.  I threw it in the bin.

After that debarcle, I was feeling rather fed up, and couldn't be bothered to do anything apart from clearaway the worktop. 

Hmm. Not good.  I know what I'm like, and I could feel there was a risk of me avoiding doing anything for days - so, before I finished clearing up, I made myself cut out fabric ready to make a Digistitches 5x7 zippered case.

The cut fabric and zip sat on the table for the restof Saturday, and all day yesterday.  Each time I walked past it, I smiled at the fabric and my careful pattern matching.

Today I decided to give it a go.

It was relatively quick. After all, I had the fabric already cut,  and I'd already made the 4x4 case so I knew what to expect.

I was really pleased with the end result.

The Digistitches cases are unpadded but are fully lined.  They are quick and easy to make.

I'm going to make a bigger one I think.

They are missing one vital size - a size I already have with my Embroidery Garden case. The EG case required whip stitching, which I just can't do neatly or reliably.   However, maybe I can use the technique used by Digistitches of leaving a larger bit of fabric at the open hem, and then wundaweb it together.

I had a quick look at the EmbroideryGarden instructions, and it might be possible. I'll try it.

I'm not sure which I'll try first - the bigger Digistitches case or the attempted adaptation of the EmbroideryGarden  design,

I bet you can't wait to see, lol.


Friday, 20 March 2015

Quick chop

Made a simple card for my neice's upcoming birthday. It's a while away, I'm just trying to get organised.

Similar process to the card I made for Darling Stepson. This is a smaller card, and I've cut the name vertically (becuase the cards don't support themselves too well horizontally).

This time I used a fabric adhesive spray on the fabric. This worked really well...although I think I must have got some on my Cammy cutting mat.  A bit of a problem as it was permanent adhesive that I used. Botheration.


Warm

It's been warm(ish) so we haven't been lighting the fire and I haven't filled up the log basket.  The sun was streaming through the french window today, and the basket has now been commandeered by a sleepy ginger cat.


A case in point

it's been a busy and "productive" few days.  Well, productive in the sense that I have produced something tangible.  Possibly not productive in the sense of how long they took.

I still can't believe that I can produce anything, it's so out of my comfort-zone,  so.... not me.

Before "First up", I made a really pretty little credit card case,  the design came from Embroidery Garden. I don't have a photo, and I can't find the case.... I think it's possible I threw it away.  It was a lovely case, but it required finishing by hand which I am incapable of doing.  I didn't realise it needed this, otherwise I wouldn't have bought the design pack.

So, on to the things I do have evidence of.

First up was a tissue case. I have several, bought, cases. None with a zip.  Here's the one I made using a design from a company called Five Star Fonts,
Zip Closed

Zip Open
 Of course I didn't manage to capture the detail with my phone's camera. The zip and lining are emperor purple. The top is lightly padded and therefore had to have a quilting stitch over it.


Following on from the success of the Tissue case, I purchased a set of cases from Five Star Fonts.  I only have 7" zips at the moment (the postman will bring me longer ones shortly), so a couple of days ago, I tackled a 5x7 sunglasses case.  This required batting (padding).  I tried with my polyester batting, but as part of the process requires stitching directly onto the batting, this was a fail.

I popped to our local fabric shop to buy some cotton batting. and some interfacing (which, confusingly, looks like stabiliser to me). I couldn't remember why I needed interfacing, I just remember having read it on some PDF instructions,  so I bought 3 different sorts.

Yesterday, I made myself sit down and try again.  It was a bit of a long process, but I think that a second attempt would be much more speedy now I know what I'm doing.   T&he cotton batting was quite thick (too thick, perhaps),  so the finished case was fairly solid.  However, as it is a specs case, I suspect this is part of the design.

This design required me to do pattern matching , so that the fabric to the right of the zip (the yellow cat) matches up with the yellow part-cat to the left of the zip.  This  time I used a bright orange fabric for the liner and a matching bright orange zip. I might try an unlined version of this - or a version lined with, say, clear vinyl - later.

Zip closed and hidden
Zip open

I still wanted something smaller, so yesterday evening I bought a zippered bag set from Digistitches. These are quick to make, don't have any batting (padding), and the final bit can be finished with Wundaweb.  I made the 4x4 purse this morning.

This time I started with the zip - I have a few brown ones - and looked for fabric to work with it. I put the pattern matching "skill" I'd learned from the Five Star Fonts one in to practise.
Pattern Matching above & below zip
Finished - Closed

Finished - open


Once the longer zips arrive I want to try making some of the larger cases. It will be interesting to compare the process from multiple suppliers, where the sizes are similar.    I also have an inexpensive design from NewfoundApplique  to try; this one has no batting or quilting.

I wonder if the grandchildren actually use pencil cases? 

Wednesday, 18 March 2015

Eggsactly

We're enjoying a reasonable supply of eggs at the moment.
 
At home, only the two youngsters, Poopy and Lotti, are laying.  The other 3, who are rising 5, haven't laid for about a year now, although Florence has been crouching for me lately, so I guess she might.

At the allotment, the 3 babies (from last year's hatch)  are all laying regularly. .  As far as I can tell, the 3x rising 6 year olds aren't laying,  a bit of a shame as I wanted to try and have a baby Norman this year (having failed last year because she went broody ).     The two 4 year olds are laying at least intermittently, I know that becuase U;ve disturbed them on the next box from time to time.  The main harem, who are rising 3, are back in lay, and I anticipate a lot of broodiness as soon as the weather warms up.

We don't have a surfeit of eggs, but we do have enough to have 2 eggs each fror breakfast every day,  4 eggs a week to give to our next door neighbour,  and eggs to cook with.  Today I attempted to make Magic Custard Cake,  I'll tell you more about it when I've seen whether or not it works.

It won't last long.  Soon broodiness will kick in. It would be helpful if they didn't all go broody at the same time.


Friday, 13 March 2015

Cheese

Thermie and I made some cheese scones earlier.

I used the standard Thermie recipe (which used a whopping 450g of flour), but used buttermilk instead of milk.

They are (or, more accurately, were) divine.

I might whip up another batch later.

Or perhaps I'd better not.


Cammy Crazy

It was most unexpected.

I bought the Cameo Silhouette ("Cammy" as s/he is now known) to cut fabric shapes for applique and embroidery projects.   After a shaky start, it's now working really well.

Of course Cammy wasn't designed to cut fabric, s/he (can't tell yet whether Cammy is a he or a she) was designed to cut paper and vinyl and stuff;  the fabric cutting  is just a bonus.

I had decided to make Darling Step Son 1's birthday card, and had sought out and bought some aeroplane fabric especially.  I knew what I was going to make, I loaded the designn onto my embroidery machine, laid out the fabric... and then I changed my mind.


I thought about Cammy and what s/he could do.  So, I decided to try  a "simple" cut of his name in the card,  backed with fabric.  Despite the " ", it really was easy.... it just took me 4 or 5 versions of text before I found a combination of font and size that showed the aeroplane pattern off reasonably.

It wasn't easy to stick the fabric to the card at the front - double sided
tape and glue dots didn't stay stuck to the fabric. In the end, I used Pritt to stick the fabric to the inner lining sheet, then used double sided tape around the inside frame and stuck the lining sheet to that.

The images are a bit big, really,  to be used in a name cutout.  I suppose I could have cut a shape....maybe an aeroplane shape... and backed that..... 

No. I'm not doing it again.    I'm not.

But I will bear that in mind for other items.


Tuesday, 10 March 2015

Gobby chickens

Since Lotti - our loopy Exchequer Leghorn - came back in to lay,  she and Poppy have been really noisy.  Sometimes it's non-stop,  and that's when there is nothing of note for her to witter about.  When there is, such as Poppy managing to escape - which she does regularly - then the volume and the shrillness increase dramatically.  She's such a tell-tale.

Sometimes she manages to get all 5 of them at it.

When peace breaks out, a rare occurence,  it's bliss.

Monday, 9 March 2015

Naturally.

I've got an intermittent back ache. 

When it gets quite  uncomfortable, I use a small heated blanket. The gentle warmth soothes and relaxes it, and it really helps take the pain away.

I@ve been careful to put the blanket up on top of the sofa, out of the way of nosey paws.  Until today when I got up to make a cup of tea.


All of a flutter

After the trials and tribulations of the tags for the Twins,  I was hoping that the card for my mother would be a little bit easier.

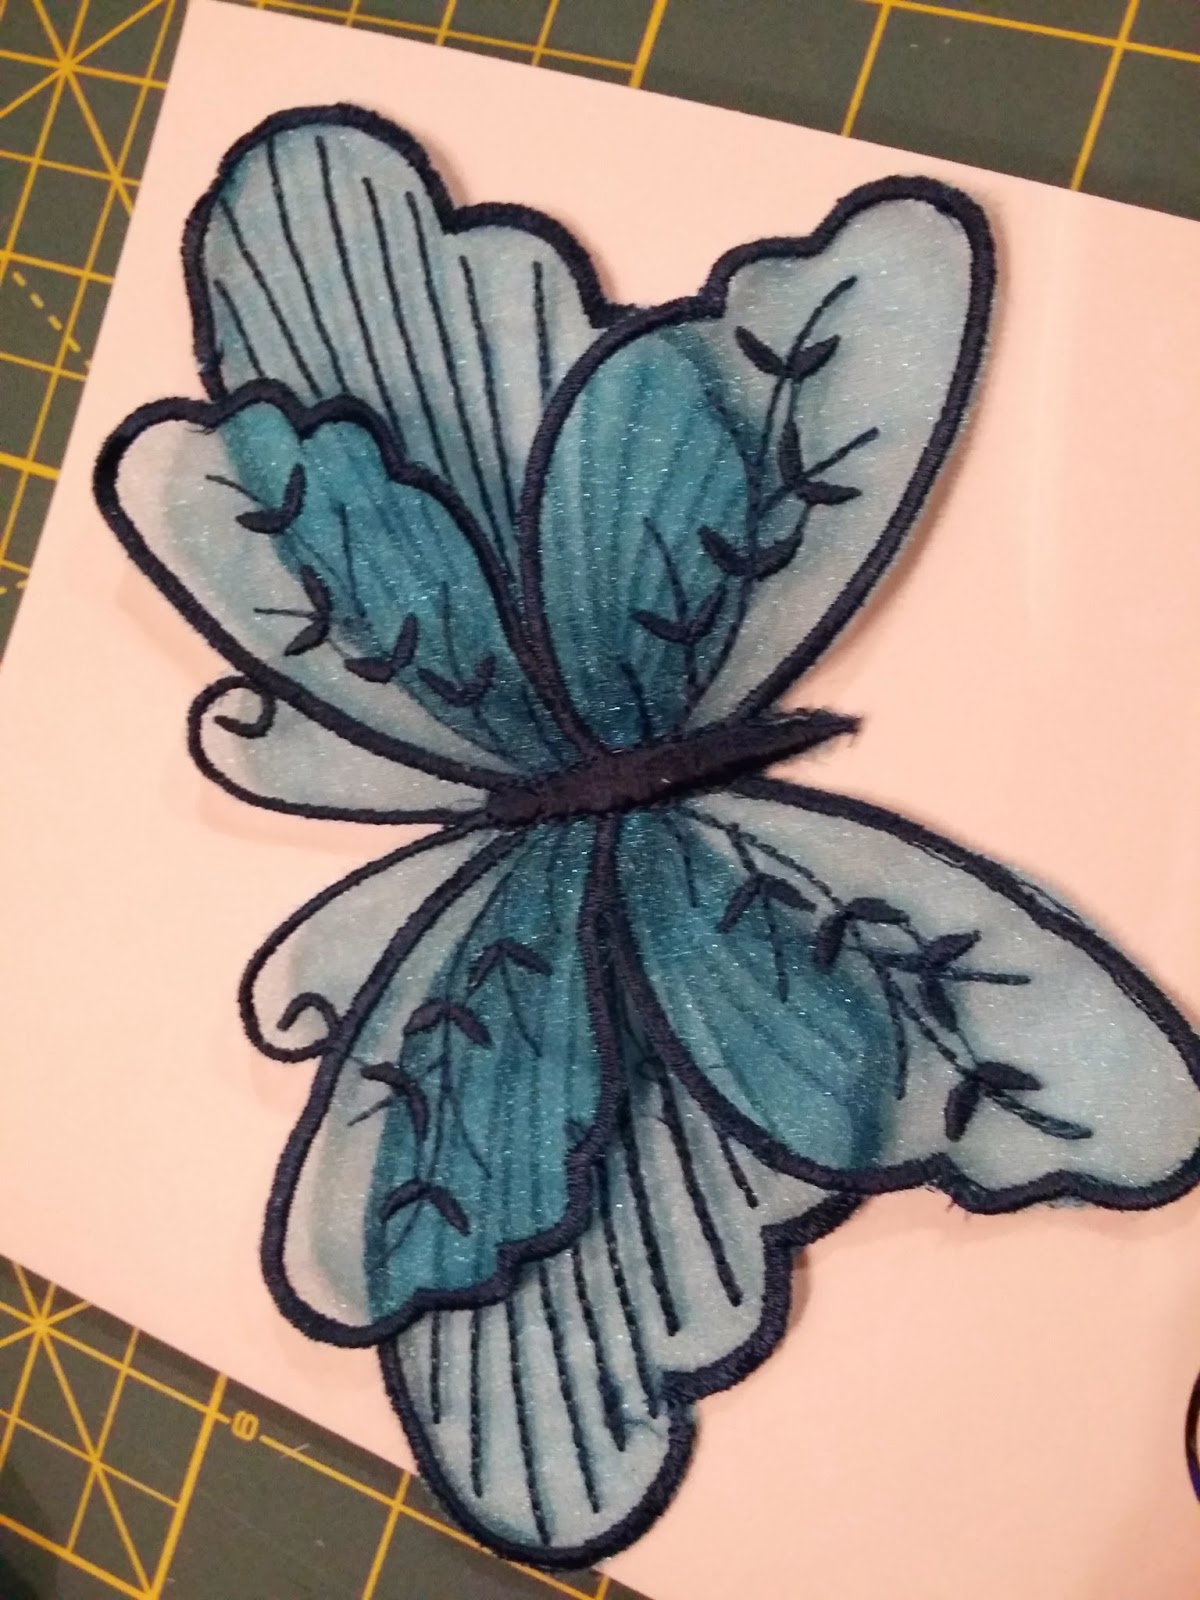
I'd already made the card for my MIL.  For my mother, I had decided to make an organza butterfly. I'd seen one of these on a Facebook page a few weeks ago and had bought the design.  I kept not getting round to going to the fabric shop, so I ended up ordering some organza online - probably a less-expensive-overall option that risking going in to a fabric shop.  

The saga of the Twins stuff meant that I had had enough of embroidery to last me for a week or so.... but I wanted to make the Mothers Day card so it was done and ready to post.    The butterfly back is made first, then the wings,  then these are attached to the body. All done in/on an embroidery hoop.

I made my first butterfly, and was really pleased with the results until I realised that I hadn't quite got the body in the right position relative to the head.   It was a good learning exercise.

By a quirk of machine hoop sizes,  the back needed to be made on one sized hoop,  the wings could fit on another size, and the teeny body and assembly is done on a tiny hoop.  This was great, as it meant I could have everything hooped and ready to go, no messing about re-hooping part way through. 

My second attempt was therefore much faster.  The butterfly was most acceptable.   The design wasn't particularly cheap, it came from Embroidershoppe.com


I used an A4 sheet of 280gsm white card, which I folded in half.  I decided to use my Cameo Silhouette to carve my mother's name out of the card, which worked well (although I think Cammy was assuming I wanted to use the letters that were cut out, rather than using the cut-out, IYSWIM. That's why the O looks the way it does). 

 I stuck some complementary fabric from my stash of fabric squares to the inside cover, which added interest to the cut-out name.   Finally I computer printed an insert, which I glued to the inside front to cover up the back of the fabric.

I'm pleased with the result, and feel strangely refreshed.

Heartless

I am sick to death of making those heart shaped things!

Some of my (many) rejects
It would all have been OK if I hadn't got it into my head to stuff both sides.  I've tried many variations now, and it always almost works, but not quite.  I got close, but the stabiliser couldn't cope and statred to come away as the last little bit was stitching.   I sighed,  cut some more hearts, and worrked out how to reinforce it.  It sewed perfectly well, but was so hard (with layers of stabiliser inside) that I might as well have not bothered with the blooming stuffing.

I had to get the presents in the post this morning, so yesterday morning I decided to sew tags without stuffing.  I couldn't face doing hearts again, so I did bows instead.  Of course I had to go through the scanning etc (sidetracking to see if I could improve that side of things),


I ended up with some beautiful bows.The final versions were lovely (although not quite perfect).#

Of course I failed to photograph them before packing intrictaely fixing them to the presents and posting them off this morning.

Oh well.

Hope they like them!


Friday, 6 March 2015

Silhouette Cameo - have a heart!

Having had success with getting my Bow templates into the software ,  I decided that I didn't want to use the Bow shape after all.  I wanted to add too much text, and couldn't see how to fit it on that particular shape.    I decided to use a heart shape instead.

So, I made up a heart in black fabric, scanned it, copied it, flipped it.   I then set up the Cameo, very carefully, to cut 4 hearts.  One of the pieces of fabric had a specific pattern on, so I had to be very careful to make sure I got the fabric in exactly the right place.

At this point, I tested using freezer paper and Filmoplast as interfacing (to keep the fabric rigid for cutting).  The Cameo manual indicated that the interfacing should go down with the fabric uppermost.    My wealth of experience with the machine over the last few days has shown me that that isn't right. It all works much better if you put the fabric on the cutting mat, and the interfacing on top of that.

My hearts cut out beautifully, and the one with the special design was perfect.

I used my Janome editing software to add text to the design, and off I went. I had decided to add some wadding to the heart and it seemed best to do this on the side that had the writing, the side that was uppermost n the embroidery machine.   It went well enough.  I put the back on,  and finished the item.

I had bits of stuffing poking out of the side stitches, and my attempt to trim them off ended in disaster - I cut trough some of the edging stitches.

Undeterred,  I decided to try again with the second heart.  This time I used not only vinyl as the stabiliser, but I hooped in some Filmoplast on the underside and floated some Filmoplast on the top.  Not only that, but I had learned enough to know to pre-score the Filmoplast before putting it anywhere near the vinyl.

The fabric placement stitch went down, securing the top level of Filmoplast.  I painstakingly removed the filmoplast from the centre,   and stuck down some wadding I'd prepared. It was cut into a heart shape and was smaller than the heart.  I trimmed it, and then I put on the fabric. I stuck the fabric where possible,  and added some Magic Tape to secure it.  The tacking stitch went down, perfect!  I removed the MagicTape.

Next, the candlewicking stitch. All looked good.  I changed the thread and bobbin thread, and the text went on.   Then I unhooped, turned it over, unpeeled the centre of the bottom Filmoplast and secured wadding, put the fabric on, put Magic Tape on. Put the hoop back on.   Tacking stitch. Then the edging stitch.  It all looked great, I started to clear up my work area ready to tackle the other heart again.

I got back to my machine and my happiness evaporated.

Part of the fabric had been missed by the edging stitch (you can just see the white showing above the edging stitch in the photo. It's much more evident on the real item.).  All the padding had made the fabric that bit too small (or I should have put some Magic Tape on, perhaps).  I stopped the machine,  tried using MagicTape,  and made it re-sew the edge.  A little better, but still missing parts.   :-( 

I let it finish, including the buttonholes, as at least then I could keep it as an example.  When it was finished I unhooped it and found that the other side was in a really bad way. 

I definitely should have cut the fabric a couple of mm bigger, and/or put MagicTape all the way along the edge at the second tacking step (removing it before the edge stitching happened.

Or not padded it.  But it's much nicer padded.


Never mind.  It's all good learning, and a good opportunity to work with the Studio Design software and the Cameo cutter again.

Silhouette Cameo - trial and error.

The Silhouette Cameo arrived early on Tuesday afternoon.  I left it on the side, unopened, while I carried on with domestics and other such avoidance activities.

Eventually I unpacked it, and tried it out using a design from their template library.  It worked really well, cutting the fabric beautifully!  I was going out on Tuesday evening, so I stopped there, happy that it was all going to turn out fine.

On Wednesday, I attempted to work with an embroidery design. I needed something exactly the right size, so I printed out the design info from my embroidery software.

 I calibrated my phone camera.  I tried to take a pic of the design and to import that pic into Silhouette studio.  I failed. Several times.

I then tried to do it using my flatbed scanner,  which after a bit of faffing about and watching Youtube videos (thank goodness for YouTube and the people who post there!), I managed to get my design imported.

I then completely failed to get the software to work with the design.  The manual, and the online help, were not very helpful at all,  so I googled and searched, and worked out what was wrong.  The Cameo software was trying to trace both sides of the outline instead of seeing just one line, and it was also too faint.

Next, I trued cutting out the design on some coloured paper and scanning that.  Now that actually worked - except that the edges were scrappy where I'd cut with scissors.   In terms of using the cut fabric,  it wasn't any better than what I'd been doing originally, it still required a lot of trimming.

Eventually I gave up with trying to use the printed image, and took the drastic step of actually creating the item using black fabric, and then scanning the created item.
This worked well, and I made up a bow with the cut fabric.  I then learned that the bow isn't entirely symmetrical, so I needed to create both a back and front template.  This was OK, I just copied the original scan and then flipped it.

I was then ready to try and make the real thing.


Monday, 2 March 2015

Re-cluttering

I've been embroidering for days.

I wanted to make some tags to put on the Twins' birthday presents.  I bought an in-the-hoop tag design, and really liked it. I tested it out, and it stitched well and looked good.   I looked online for fabric specific to each of the two children.   I found what I wanted, and quite a lot more besides. While I was shopping for fabric for the twins, I ordered some sticky stabiliser.  And a few other bits and pieces.

Of course, when I find something easier than expected,  I have to make it more complicated. I have to try harder,  do better,  make better,  more intricate,  more detail....

I tried using vinyl as a stabiliser, to avoid getting white bits round the edge of the pieces. .  I'd bought some ages ago from that trip to FabricLand,  but I thought I'd bought stuff that was too thick.  I had ordered some thinner vinyl the other day but it hadn't arrived, so I decided to try the thicker stuff anyway. 

The embroidery design site I perhaps love most, BigDreamsEmbroidery,  announced a sale to celebrate something or other.  I greedily emptied items from my wishlist into my basket and bought them.     I tried out some of the designs as possible alternatives to the tags.  They were amazing.  Everyone was double sided, with different fabric front and back.

I stitched out different sizes, different fabrics.  I couldn't stop.  I tried different stabilisers.  I added text.  I threaded some of them onto ribbon so I could keep them together. 

I ordered yet more fabric squares in various sizes. It's not particularly cost effective on a cost-per-metre basis, but on the plus side it gives me a wide variety of fabric colours and patterns, and I can always go and buy proper amounts of those fabrics which I end up using a lot.

I started to get a bit fed up with cutting round the fabric on the hoop, mainly because I'm not that good at it.  I wondered about cutting the fabric first.

I asked DH if he could laser me some templates,  or build them with his 3D printer.   We discussed it in detail and decided not.   I tried making templates using the machine, I had this great idea about stitching out the outline until the paper was perforated, then that would give me a template......trouble is it doesn't help with my accuracy.

I looked online.

I found something that might work.

I asked about it on a relevant Facebook page, and the discussion that ensued was really helpful.  I watched some videos.  I showed it to DH.   I ordered it.

Fabric storage 'A'
Meanwhile, the fabric - and stuff - started arriving. On Saturday, a couple of packs of fabric-by-the-metre arrived.  And some pre-cut squares. And the tabletop sleeve-ironing board - which is a perfect size for ironing my embroidery bits and pieces and has been in use today.

Today, the post was full of little packets.  Luckily, the packs arriving in the post were mainly either pre-cut 5" squares or fat quarters so when I got them out they didn't look too much.

I've re-organised the fabric shelves.  The non-fabric stuff is now piled on the floor waiting for me to find it a new home.  I'm not sure where that's going to be, I can see this all spilling over into the spare bedroom.

Fat Quarters

I've made myself a little fat-quarter (FQ) storage box out of a cat food box, so I can pick up the whole box and bring it downstairs.    I've even made 5" square "bolts" as well.  Each FQ is wrapped round a bolt, which gives it some rigidity and means it is easy to see the pattern from the edge.  I can flick through without the fabrics all screwing up.  .


Today the stabilisers arrived, and they are all over the worktop.  

Add caption
As a test run with the sticky stabiliser - and making myself use my digitiser software - I created a personalised Mothers Day card for my lovely mother in law. 

Pic is  of my second attempt, and this is the one I'm going to send her.


I still haven't made the twins tags yet. I'm waiting for the cutter thing to arrive, and I'll use that.

Goodness knows where that's going to live.


Friday, 27 February 2015

Mucky pup

I had decided, yesterday, that if today was sunny I'd sort out the compost. We have 4 bins which are full, but have not produced compost.  They need relocating to a sunnier spot, and the compost needs turning.


It was sunny, gorgeous day for being in the garden, so I put on an old jumper and set to work,

I started with an empty bin,Bin 0,   and started to empty Bin 1 into it.  Eventually I got to a point where I could lift bin 1 off the compost and finished shovelling.

Then I moved Bin 1 to it's new home, and started emptying Bin 2 into it.

Then Bin 3 into Bin 2.

The Girls came to watch, lined up along the fence.

Finally, Bin 4 into Bin 3.   To be honest, I'd had enough long before I'd got bin 4 to the point where I could lift it off.  

I need a cup of tea.


Clacketyclack

Yesterday, during and after uncluttering, I stitched out some more of the myriad of embroidery designs that I now own.   Clackety clack, clackety clack.

I went upstairs and I could hear clackety clack. A different clackety clack

DH was using his lathe to turn a bowl.

Who are these people that we have become?

Un-cluttering

DH built the cupboard that evening.   We'd had to remove the gateleg table (which had it's own drinks cupboard inside), and clean up a bit first.  We discussed the positioning of the drawers inside the unit - I've gone for 2 outside drawers, with additional shallow drawers inside.   I like the sleekness of two big drawers on the outside, but need the storage capacity of more drawers and this gives me an opportunity to see how it works in practise. I decided I needed to think about it, so that part waited until Wednesday. 

On Wednesday, it was all installed.

Yesterday I started trying to organise things into it. After lots of farting about, it was done.

It came with blue protective covering over the drawer fronts and I quite like the shock of the blue colour.  

It doesn't go with anything else in my kitchen, and it isn't a colour I would have chosen, but I quite like it. I will peel it off today to reveal the vanilla coloured fronts.

The workbench isn't quite tidy and clear yet, but it is looking better.

I haven't decluttered at all, I've just un-cluttered. A bit. For now.

Clutter

The embroidery continues.  Clutter increased on my workbench.   Boxes of threads.  Reels of stabiliser. I bought kitchen towel holders to make it easier to move the stabilisers around; I now have 4.  That doesn't count the stabiliser which is flat, which is propped up against a wall;  or the water-soluble stuff which is in a box upstairs (a kitchen is not a place to keep something which dissolves).   There's magnetic knife block with my scissors, tweezers, clips and stuff;  the box with the machine feet; the needles..... it goes on and on and on.

I had sorted out a cupboard upstairs to organise my fabric. It has storage boxes in front of it containing stuff like bindings,  cords,  ribbons,  and apron tapes (which are great for bunting). There was no room for any of the downstairs clutter.

We had decided some time ago that storage underneath the worktop would be required, and a little while ago I decided that an Ikea kitchen unit would probably work best.   Either 60cm- wide x 40 deep, opening under the worktop,a bit awkward; or 40 wide x 60 deep opening to the side and requiring me to move the bin each time.  I needed to see the units and drawers "in the flesh" to decide and, as this meant a trip to Ikea, I kept putting it off.

Eventually, DH asked what we were going to do about storage and I told him. I explained that I wanted to look at the kitchens anyway, as I am seriously thinking about an Ikea kitchen.  We set a date to go to Ikea - yes, it really does require planning - and eventually The Day arrived.    

Ikea is actually only  about 40 minutes away.  It usually takes longer to get back.    I normally go to Ikea on my own, as I can pretty much guarantee that one of our gruntles will be dissed if we go together.  

The problem isn't getting to Ikea, it's (a) the parking, and (b) how long it takes to get around and do everything. Even a quick "in and out" isn't quick at all, especially if it involves buying a kitchen unit - it requires 2 additional lots of queueing: once to order the items, and then again after the checkout to wait for the order to be picked and assembled.

We walked through most of the store very quickly, stopping maybe twice to look at something. We got to the kitcheny bit, and it took forever.   I wanted to examine the cupboards and drawers. I wanted to see how the different drawer combos worked.  I evaluated all the insidey bits.  I thought about our kitchen. I studied the doors.    DH did well, really. 

Eventually, we discussed a drawer for the embroidery stuff, and agreed what size we wanted. We then discussed the drawer configuration, and innards, and queued to order.  We then bought lots of innards. Experience has shown me that it's quicker, easier and better to return items having bought too much than to have to go back and buy more. The Returns department doesn't necessitate going in to and round the whole store.

We raced through the rest of the shop.
We queued to pay.

We queued to wait to collect the kitchen unit.

And we went home.  Without arguing, Without even a bit of gruntling.

Wonders will never cease.


Sunday, 22 February 2015

Lovely Lotti

Lotti (short for "Borlotti", a reference to her gorgeous markings) is a loopy Exchequer Leghorn hen.   Yesterday she crouched for me, so I knew that she would soon re-start laying.  Poppy has also been crouching, but no sign of any eggs from her yet.

Today I had to put the Girls away so that I could go and see to the Allotmenteers.  The Garden Girls are well used to being called into their run and rewarded with corn, and I was a little surprised to see that Lotti wasn't around.  I checked the nestbox on the Cube - empty.  

I realised that she must be in the pampas grass somewhere.  She has made a nest in there before, so I knew to look at my head height, not on the ground.  I heard little chirrupings, and soon saw her, nestled in a hollow, throwing bits of pampas onto her back,

There was no sign of any eggs, so today must be the first.  I waited for about 15 minutes, but nothing happened. She continued to turn around, throw papas, snuggle down, chirrup, throw pampas, stand up, turn around....

I left her to it.

When I got back she was happily rootling around in the garden.  I checked, and the nest looked empty. 

I looked more carefully and discovered an egg, covered in pampas bits.

I wrote the date on the egg, put it back, and covered it over again.

At least I know where she is laying. I don't want to put her off by removing the one and only egg she has laid there so far. I'll check each dat and write the date on any eggs, and when she's laid a few I'll start removing them.


Grandma-ing, continued

On Monday I suggested we made some biscuits. I remembered that I had a cookie press in one of the cupboards, so I dug it out. 

My trust ginger biscuit dough was loaded in, and off we went.  Or didn't.  We tried greasing/not greasing the baking tray.  In the end, we searched for a Youtube video to help.  We saw someone using a different type of press, but got the idea.

It was OK, but the mixture probably wasn't the best consistency.  It was the type of machine where you have to click the handle, and DGS's hand was soon aching from the effort.   We decided to try a different consistency dough, and that's when I realised I didn't have enough defrosted butter.   I got ready to go to the shops, and looked online for a recipe for the particular press we had.

I couldn't find one for that press.  I looked on the Lakeland website, which is where I got said press from.  Nope. In fact, they didn't do that press anymore.   I did a double take at the press they now did,  it was one which didn't require clicking, just a simple press.

I decided to buy the different press as well, so we rushed into town to Lakeland.   We couldn't find the press anywhere.  I asked.  There were 6 on the shop floor somewhere, just no where that we could see. Neither could the assistants.  A search ensued, and eventually the 6 were located.

We came back, tried it...and it was amazing.  I mean, really, really great. Easy to use, and such fabulous shapes.   We filled tray after tray, baking 2 trays at a time.   I meant to take pics, but completely failed.

The biscuits were lovely.   We sampled plenty, and kept on doing "quality checks" to make sure they were OK stored in a tin. This went on over a couple of days.

For the sake of my waistline, I packedmost of them up in a tub for DGS to take home with him.

The pic shows the cookies being done on a sheet of baking parchment, but we had better luck on an ungreased baking tray.


Monday, 16 February 2015

Grandma-ing

My lovely eldest grandson has come to stay for a couple of days.   DH is away, parent-sitting, so it's just the 2 of us.  He is of an age now where we can have proper conversations, has sensible opinions,  and it's always interesting to hear his views on things.

We made pancakes for dinner - well, tea I suppose - and he learned how to hold the pan in one hand, the batter in the other, and to pour and twirl. I also showed him how to flip pancakes with a turner. (He had earlier asked me if I was a tosser, which made me laugh a lot).

I had to make a second batch of batter, we couldn't quite finish it.  I said I'd have a go at tossing pancakes, although it had been a long time since I'd tried and I hadn't been vey good.    I surprised myself by managing it very easily.   He asked me if how many tosses I could do, so I had a go. I stopped at 20.  We discussed the physics of tossing, and why high tosses were more likely to fail.  I did try some high tosses, after a couple of good ones, an semi good one, it finally ended up on the floor.

It took some persuasion to get him to try. Reassurance that the batter would only be thrown away otherwise so it didn't matter if he dropped it, eventually he had a go.  I showed him the technique I used,  and he managed to do it.

He then set to work on the lego battleship I'd rediscovered recently. I'd bought for him  a year or so ago, put it under the bed in the spare room, and had forgotten about it.


Saturday, 14 February 2015

The World's Most Expensive Apron

You may remember that my decision to make bunting for DH's special birthday led to me buying a sewing machine, and then an embroidery machine, and then lots of embroidery thread, and then selling both machines and buying a combined machine,  and so on, resulting in the world's most expensive bunting...?

Well, I think I have now made the world's most expensive apron.

You may remember the story of the patterns and me asking my aunt for help, well, this is what happened next.

Tuesday arrived and I went fabric shopping to Fabricland.  I needed 2.5 yards of fabric in 2 coordinating fabrics.  I picked out several possibilities, and decided to buy 3 metres of each to give myself some leftovers to make cute little purses and things.

I spent a small fortune. 

On Wednesday afternoon my Aunt arrived, and we got started.  I was nervous about using fabric from my new stash, I wasn't at all confident in my abilities.   I had a brainwave of using a pretty duvet cover (one I'd bought, brand new, to make into bunting in fact).    That way, if I made a cock up it wouldn't matter.

It was a long, slow, process.  The apron is reversible, so there was a lot of fabric to deal with, and the two sets had to be sewn together before the garment could be assembled.   I decided I didn't want pockets, which saved several years of sewing.
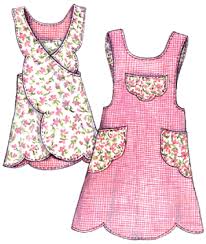
Four and a half hours later, we were near the end. I turned the nearly-finished apron through one of the open shoulders, shook it, and voila, we were ready to do the shoulders.

We read the instructions. which involved laying the apron face down, then crossing over the left back to the right front, and then.....blah, blah, blah,  We could not for the life of us work out what to do. We looked again and again at the four layers of fabric for each shoulder, trying to work out what to join to what and how.   Understandably, the instructions were written by someone who knows what they are doing, for someone who knows how to sew.  They didn't make sense though.

I decided I wasn't thinking clearly enough, and called it a day.


I asked my Aunt J to join me for dinner, and made a chicken risotto in Thermy - superfast, supereasy, super-delicious.  Despite getting stuck, it had been a really good afternoon.

On Thursday, I procrastinated most of the day.  I went and saw to the allotment chickens, all the time going over the four pieces of fabric.   When I got home,  I turned the apron outside-in again, and re-sewed the edges as some of my seams weren't great. I also decided to overcast all the way around to prevent the ends fraying, It took some time.  I was actually quite chuffed that I'd thought to do this.    In preparation for the final top stitching, I did some tests on fabric.  I kept looking at the shoulders.


I contacted PaisleyPincushion  with a detailed explanation of where I'd got to and why I was stuck.  While I waited for a reply, I googled shoulder seams and read impossible-to-understand explanations. I watched a couple of videos.  One website was making a reversible top, the front was black and the back was blue.  She mentioned that you had to sew black to black and blue to blue.

I went back out to the kitchen, and looked at my apron shoulders again.

And then I realised why all the talk of "contrast t contrast" wasn't making sense.   I'd put the back pieces on the wrong way round. I had my contrast fabric showing, instead of the front-fabric.  THAT was why I couldn't sort out the shoulders.

The pattern lady's reply confirmed about the "main to main".  I realised that I needed to sew the two inner pieces together,  and then the two outer pieces.   By now it was late on Friday and I decided to wait until the next day,

So today, I did it.  It took me a while. I had to check that all my marks were in the correct place despite the pieces being reversed.  I had to get the pattern out to make sure.   I sewed my first seam, one of the underside ones, and it was good, The second one, the topside, I realised I had gone wrong as the seam was showing.  I unpicked it, and twisted the shoulder round to try and work out how to do it from the other side.  The material was fraying badly, and I wasn't sure it would work.   It did!  When I managed to do the first one, I cheered out loud.

When I'd finished all four, I was amazed to find that they lined up pretty well.  This was especially important because of my cock up with the back pieces,  the place of the join was pretty obvious. 

When it was done,  I took a deep breath and started top stitching all the way round with a decorative satin stitch.  It took forever.

Shoulder seams - from a distance

Shoulder seam - needs threat trimming

My top stitch decoration
Even though it was made in cheap and cheerful fabric, I quite like the bright pattern.
Front
Back (panels are the wrong way round, this is the inside fabric)

It is, of course, waaaaaaaaaay too big. Good job I hadn't used my expensive fabric to make this version.

I don't care though.  I'm really pleased that I've managed to make something. I know it might seem like it's only an apron but it isn't.  It's a reversible apron, with quite a few bits to it.  Sewing is also something that doesn't come naturally to me at all,  so the whole thing has been a bit of a challenge.

Rather than make it again in a smaller size,  I think I might try another pattern. Maybe the other Paisley Pincushion one.  Although I do quite fancy the idea of making one with slimming princess seams down the front. I was picturing using some plain fabric for most of the apron, and then some of my lovely stuff for the centre panel.

I can feel another night's googling coming on.


Monday, 9 February 2015

A spring in my step!

What a fantsatic day of Spring weather we had yesterday!

Early February, yet it was sunny and warm enough to have the back doors open.  All that lovely fresh Spring air,  letting my house breathe for a few hours.

Wonderful!


Sunday, 8 February 2015

Back in action

At last!

DH is now able to remove the back brace for extended periods. He has to make sure he's wearing it if he's doing anything that might involve any sort of bending or lifting.

The vertebrae will never bounce back to its original shape, but it is healing well.


Quick Trim

Having failed miserbaly last winter, we were determined that tthis yearwe would get two of our apple trees professionally pruned.  They are getting too tall for the appes to be easily reached (even with an apple picker). They also grow over on to some common ground. I don't mind people picling apples from the other side, but in the last few years people have been quite vicious while doing. Last year someone brought a broomstick with them, and wrecked some of the branches in their greed to get apples. They took so many, and didn't care about the damage.

Before
After
It's difficult to show you the trees concerned because there is a very badly overgrown pear tree in the way.


Tree 2 Before
Tree 2 After


We'll aim to get the other apple tree and the pear tree done next year.

and sew on

I'm feeling a slightly shameful sense of pride.  I managed to use my machine to hem 4 pairs of trousers, and it went really well! I feel a bit sheepish, as of course DH is probably perfectly capable of hemming his own trousers. But I was curious to see if I could do it.

I feel that I've saved us £40, as it cost us £10 per pair to have them hemmed when we've done it before.

I'm also planning to make myself a new apron, one that is suitable for the larger busted lass. 

Normal aprons, the ones with the normal apron-tie round the neck, don't stay in place,  Some years ago I managed to sew a proper fabric collar on to such an apron, and it worked beautifully.  Now though, I plan to sew something a little prettier.

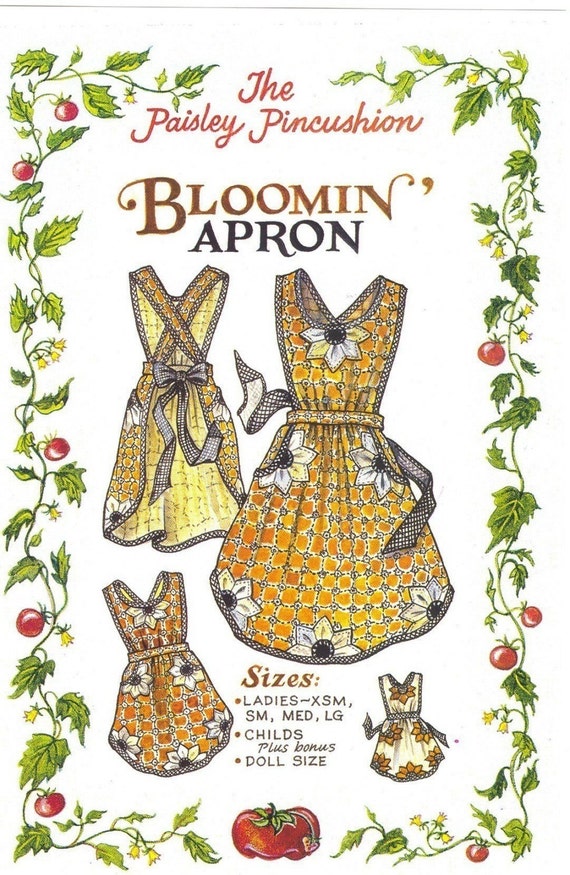
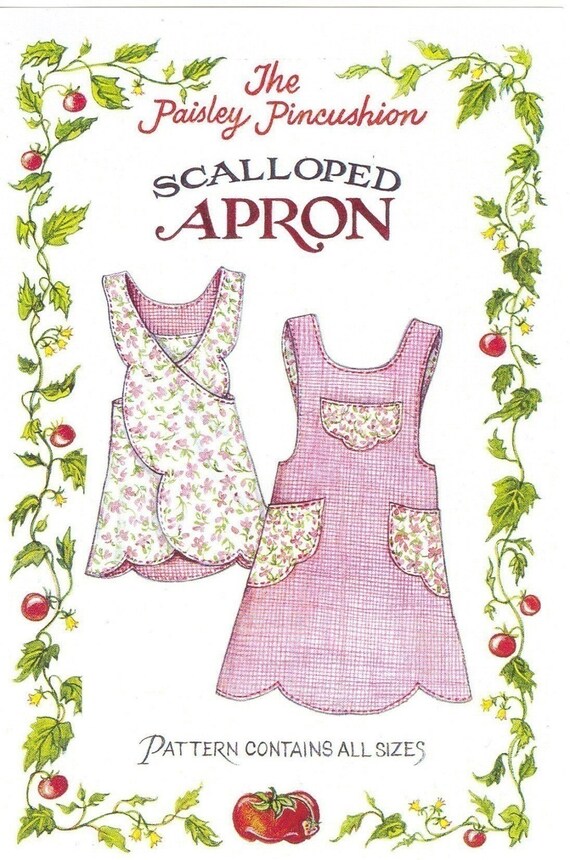
I bought a couple of patterns from Paisley Pincushion , via Etsy,  for such aprons.

This one looks like I can make it look a bit more tailored:
This one looks like an easier pattern to follow and doesn't require tying, but it might look a bit baggy...
They arrived a little while ago and I finally opened them yesterday to see what fabric I need to buy.  The instructions are easy, if you know about these things,  but to me  it was like reading an engineering manual.  I could undertstand the fabric requirements, but the first instruction was copyingmarks on to the fabric and then sewing the darts.

I know what a dart is, in sewing terms.   I have no idea how one is sewed.

I emailed my Aunt, who did a lot of dressmaking when she was a little younger, and she has very kindly agreed to help.

I was going to use a "Chicken Run"duvet cover I'd bought , the pillowcase has pics of Mrs Tweedies Pies. My brother calls me Mrs Tweedie because I have lots of pet chickens.

The main part of of the duvet cover has an enormous Gnger and Rocky picture,  so that's no good.  And it really would be a shame to cut it up.

So, I'm going to fabric shop on Tuesday, and have a go on Wednesday.


Sew and sew

My collection of bought embroidery designs is getting out of hand and I have had to get seruously organised.

I now have a spreadsheet listing all the designs, complete with pictures, my ratings, and information on where I have put the embroidery files (and how big the designs are, how many stitches, the set name if it was part of a set........).

I've also continued with stitching out the designs, so I have a sample of each one.  That's taken a while, and I've still got loads to do.

This is one of the first designs I bought, but I've only just tried it.

Truth told, it's too big to be of much practical use....unless I did it either side of the front of a black waistcoat or something. The colours are gorgeous.

I've got a couple of samplers - here's one:
I've also had a go at an in-the-hoop banner - well, one pennant - and tha was interesting. I might try this again properly, I was just messing about  which is why the letter is rubbish:
It's still a bit too big for what I want, I might contact the designer to see if they could do some miniscule ones.

This is all so  not me, I'm fascinated by it all.


Bin there, done that.

We have 2 lovely auto bins in our kitchen.  One a large, 50L bin, and the other is a smaller one for food recycling.     We've bin very happy with them.  I've got so used to them that sometimes I stand by the chicken feed bin, which is not a sensor bin, waiting for the lid to open.

In the last month I have managed to lose the bag ring from the small bin.   I didn't exactly lose it.  It was a sleety evening and I was emptying the food wate into the outside food bin.  The inside bin was a bit full, and I knew if I took the compostable bag out, it would split... so I carried the whole bin outside, and emptied it into the bigger food recycling bin.

I came in, washed the bin out, and put it upside down on the draining board to air and dry.

The next morning, DH put the bin back together and asked me where the bag ring was.   I knew at once.  It had obviously gone into the bigger food bin, along with the food and the compostable liner.

Unfortunately,  the bin men had bin in the meantime.

No response from the company about how to obtain a replacement.

....

And a few days ago I took the lid off the bigger bin, in the usual manner.  The lid flipped open, I picked it up and pulled the lid off.   Except it came off. Right off.   I 'fessed up to DH.   It was broken. Truly broken.  A tiny piece of plastic had come off and wasn't fixable or replaceable. We needed a whole new lid.


This particular bin had bin horrendously expensive and I could see that, even if I got a reply from the supplying company - which seemed unlikely given their past form - a substantial part of the cost was the lid.

I decided it would have to wait until next month.

We put the lid back on, but it was a nuisance.  We left the lid off. It was worse.

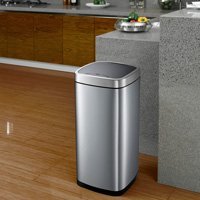
By a stroke of luck, Costco were selling cheap autobins (completely different shape, mechanism, size), and I decided to get one while they had them in stock.  They were  much cheaper than I expected

 It works really well.  The lid is a bit flappy,  but the sensor is great. It also senses that you are standing there and doesn't slap the lid down just as you are pouring rubbish in.

So that worked out OK then!


Followers